
Last Updated: October 24, 2026
Quick Summary
A professional nail technician supply checklist in 2026 starts with four non-negotiables: prep tools, an electric file system, a gel or acrylic enhancement line, and sanitation supplies. Everything else is tier-two, added as your client base grows. Miss any core category and your service fails early or fails inspection.
- Buy nippers and pushers in stainless steel, and buy two sets so one works while the other disinfects.
- The Kupa MANIPRO Passport E-File Control Box runs $225.00 and pairs with the $395.00 KP-60 Handpiece.
- The GelBottle Illuminate Nail Lamp at $249.00 offers 30, 60, and 90 second timers with auto-sensor activation.
- Buy acrylic powder and liquid as a matched pair from the same manufacturer to avoid cloudy, brittle results.
- A full build-out across all three tiers lands somewhere between $1,730 and $3,640.
Table of Contents
- What Belongs on a 2026 Nail Technician Supply Checklist
- Nail Technician Tools and Equipment for Prep and Finishing
- Gel Nail Supplies for Professionals: Lamps, Bases and Color
- Acrylic Nail Supplies Checklist: Powders, Liquids and Monomer
- Nail Salon Setup Supplies, Sanitation and Licensing Requirements
- Budget Tiers and Phased Purchasing for New Technicians
- Restocking, Maintenance and Mobile Kit Planning
- Stock Your Station With Classique Nail Supply
- Frequently Asked Questions
What Belongs on a 2026 Nail Technician Supply Checklist
A professional nail technician supply checklist in 2026 starts with four non-negotiables: prep tools, an electric file system, a gel or acrylic enhancement line, and sanitation supplies. Everything else is tier-two, added as your client base grows.
That mistake costs more than any product decision you'll make this year. Dull files and a weak lamp cause lifting, lifting kills rebooks, and lost rebooks cost far more than a bargain lamp saves.
The Core Categories Every Station Needs
Every station, home-based or salon-based, needs coverage in five areas:
- Nail prep tools, files, buffers, cuticle tools, clippers
- Electric filing, drill, handpiece, bits, sanding bands
- Enhancement systems, gel polish, lamps, acrylics, or dip
- Workstation equipment, table, mat, lighting, seating
- Sanitation and PPE, disinfectant, gloves, masks, waste handling
Miss any one and your service fails early or fails inspection. Below are the specific items that earn their place in each category.
Nail Technician Tools and Equipment for Prep and Finishing
Hand tools do the foundation work, and cheap ones show up in your results within weeks. A nail file is graded by grit, and grit choice matters more than brand: lower numbers remove product, higher numbers refine shape and seal the free edge.
Your prep and finishing drawer should hold:
- 180-grit files for shaping natural nails
- 240-grit files for finishing and sealing edges
- A 100/180 combo file for acrylic and gel removal
Buy nippers and pushers in stainless steel, and buy two sets: one works while the other is in the disinfectant. If you're building your first kit, our guide to the best professional nail tools for beginners covers what to buy first and what to skip.
Electric Drills and Drill Bits
An electric nail drill is a rotary filing system that replaces hand filing for product removal, shaping, and cuticle work.
A portable control box plus a separate handpiece gives the most flexibility.
Bits matter just as much.
Running a drill on a natural nail without practicing speed control on a fake tip first is the fastest route to a damaged nail plate and a lost client.
Gel Nail Supplies for Professionals: Lamps, Bases and Color
Gel systems live or die on the lamp. An underpowered or mismatched lamp leaves inhibition layers uncured, and uncured gel peels within days no matter how good your application was.
A professional gel setup includes:
- A curing lamp matched to your gel brand's wattage requirements
- Base coat, color gel, and top coat from a single system
- Cleanser and lint-free wipes
The GelBottle Illuminate Nail Lamp at $249.00 uses a dual LED source with auto-sensor activation and 30, 60, and 90 second timers, accommodating both hands or feet.
Never mix a base coat from one brand with a top coat from another and expect reliable adhesion. If you're still weighing lamp options, our gel lamp comparison guide breaks down the differences.
Acrylic Nail Supplies Checklist: Powders, Liquids and Monomer
Acrylic work needs a short, specific list. The chemistry is unforgiving, and substitutions cause lifting, yellowing, or service breakdown.
- Acrylic powder in clear, white, and cover pink
- Monomer liquid, stored in a sealed glass or HDPE container
- Dappen dishes and a monomer-safe dish
Buy powder and liquid as a matched pair from the same manufacturer. Mixing monomer brands produces cloudy, brittle results no technique can fix.
If you're deciding between systems, our 2026 professional acrylic system guide covers the powders, liquids, and monomers worth stocking.
Nail Salon Setup Supplies, Sanitation and Licensing Requirements
Sanitation supplies are not optional extras, and in 2026 they're the first thing an inspector looks at. Your setup needs hospital-grade disinfectant, a labelled disinfection jar, single-use gloves, masks, eye protection, and a covered waste bin.
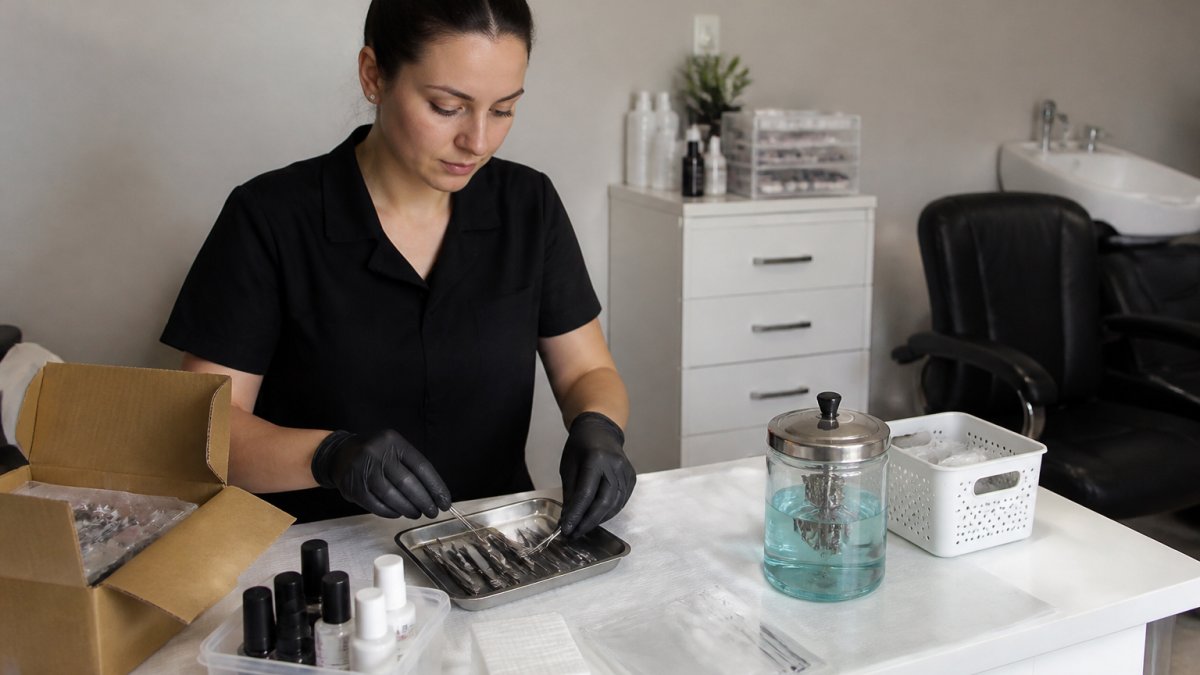
Workstation equipment rounds out the room: a manicure table or nail desk, a cushioned nail mat, adjustable task lighting, a comfortable client chair, and drawer storage that keeps clean and dirty tools physically separated.
What Canadian Technicians Must Comply With
Rules vary by province and territory, so treat this as a starting point, not legal advice. Public health units generally require a trained technician, a documented cleaning and disinfection routine for reusable implements, and proper handling of single-use items.
Dust and chemical exposure controls belong on this list too. Wear a mask when filing, run extraction or ventilate the room, and never eat or drink at the workstation.
A Compliance Checklist You Can Actually Use
Most checklists blur what's recommended and what's legally required. Here's how to separate them.
Legal requirements (verify with your local public health unit):
- Blood-borne pathogen training. Many provinces require documented training before you can work on the public. Keep your certificate on file and renew it on the schedule your jurisdiction sets.
- Written cleaning and disinfection protocol. Public health inspectors typically ask to see a documented routine for reusable implements, including which disinfectant you use, contact time, and how you log it.
- Single-use item handling. Files, buffers, and porous items that can't be disinfected must be discarded or given to the client after use. Keep a covered waste bin at the station.
Recommendations (not typically legislated, but expected by clients and insurers):
The GelBottle Illuminate Nail Lamp →
- Autoclave or heat-sterilize metal implements between clients if your disinfectant protocol allows it.
- Keep a sharps container for broken bits and nippers.
- Post your disinfection log where clients can see it. Transparency builds rebooking.
Mobile and Home-Based Compliance
Mobile techs face the same sanitation standards as salon techs, but harder logistics: sealed transport containers for clean and dirty tools, a portable disinfection jar that won't leak, and hand hygiene access at every client location.
Home-based studios often trigger additional zoning or business-licence requirements. Techs commonly assume a home studio is exempt because it's not a storefront; it usually isn't.
Budget Tiers and Phased Purchasing for New Technicians
Most new techs overspend on color and underspend on the tools that determine service quality. Phase your buying in three tiers instead.
| Tier | What to Buy | When to Buy |
|---|---|---|
| Tier 1: Essentials | Files, buffers, cuticle tools, one gel system, one lamp, sanitation kit | Before your first client |
| Tier 2: Efficiency | Electric drill, handpiece, bit set, second tool set for rotation | After 10-15 clients |
| Tier 3: Expansion | Acrylic system, dip powder, nail art range, second lamp | Once bookings are steady |
Buy Tier 1 completely, cheaply where it's safe. Spend on the lamp and drill; save on storage bins and mats. Phasing keeps cash free for what actually grows a new business: marketing and rebooking.
What Each Tier Actually Costs
Competitors list supplies but rarely put numbers on them. Here are realistic ranges in Canadian dollars, based on current professional supply pricing. Treat these as planning estimates, not quotes.
Tier 1: Essentials (before your first client)
- Hand tools (files, buffers, cuticle nippers, pusher, clippers): $80-$150
- One professional gel system (base, top, 6-12 colors): $150-$300
- One curing lamp: $150-$300
Tier 2: Efficiency (after 10-15 clients)
- Electric drill control box and handpiece: $400-$650
- Bit set (diamond, carbide, sanding bands): $60-$120
- Second set of hand tools for rotation: $80-$150
Tier 3: Expansion (once bookings are steady)
- Acrylic system (powder, monomer, brushes, forms): $150-$300
- Dip powder system: $100-$200
- Nail art range (gels, glitters, tools): $100-$250
A full build-out across all three tiers lands somewhere between $1,730 and $3,640. That range is wide because the biggest variable is whether you buy entry-level or professional-grade equipment. The drill and the lamp are the two places where spending more upfront usually pays back faster.
Where to Spend and Where to Save
Spend on: the curing lamp, the drill handpiece, cuticle nippers, and disinfectant. These four items directly affect service quality, client safety, or both.
Save on: storage bins, mats, table covers, color range at launch, and nail art.
Skip entirely at launch: a second lamp, a full acrylic line if you're starting with gel, and premium brush sets. Add them when client demand justifies the spend.
A Phased Purchasing Calendar
Working techs commonly buy in three waves:
- Month 1: Tier 1 essentials only. Practice on friends and family before you charge.
- Month 2-3: Add the drill once you have 10-15 paying clients and your hand-filing speed is the bottleneck.
- Month 4-6: Add acrylic or dip only if clients are asking for it. Don't stock a system you won't use weekly.
This calendar keeps cash free for marketing, insurance, and consumable replacements. New techs who buy everything at once often run out of money before they run out of clients to book.
Restocking, Maintenance and Mobile Kit Planning
Restocking is where established techs lose money quietly. Set par levels for your top five colors and reorder at the threshold, not when you run out mid-appointment.
Maintenance schedule to follow:
- After every client: clean and disinfect bits, wipe the lamp, sanitize the table surface
- Weekly: inspect files for wear, check monomer seals, restock gloves and wipes
- Monthly: audit color inventory, replace worn buffers, check drill cords for strain damage
Cleaning drill bits properly extends their life significantly. Our guide on how to clean your nail drill bits like a pro covers the step-by-step process. For restocking discipline, these salon inventory management tips will keep your shelves from swinging between empty and overstocked.
Mobile techs need a different build: a rolling case with padded bit storage, a portable lamp, sealed containers for liquids, and a folding table that fits a small workspace. Pack in the order you work, so prep tools come out first.
Stock Your Station With Classique Nail Supply
Building a checklist is easy. Buying it well, from a supplier that stocks what it advertises and ships fast enough to save a cancelled appointment, is the harder part.
Classique Nail Supply is a Canadian-owned supplier carrying professional-grade gel polish, acrylic systems, lamps, drill bits, and salon essentials from brands working techs ask for by name.
Start with Tier 1, add the drill when your bookings justify it, and build from there.
Frequently Asked Questions
What supplies does a professional nail technician need to start?
A working starter set covers four groups: prep tools such as files, buffers, cuticle nippers and clippers; a curing lamp and gel system; an acrylic powder and liquid set if you offer enhancements; and sanitation supplies including gloves, masks, disinfectant and a covered waste bin. Add a drill with bits and sanding bands once you take on volume. Buy one complete system per service type rather than mixing brands, because base coats, colors and top coats are formulated to work together.
What are the essential nail technician tools and equipment for a beginner?
Start with hand tools you will use on every client: a 180-grit file, a buffer block, cuticle pusher, cuticle nippers, nail clippers and a soft dust brush. Then add a curing lamp and an electric file. The GelBottle Illuminate Nail Lamp at $249.00 runs 30, 60 and 90 second cycles with an auto sensor, which suits both gel polish and builder gel work. A drill such as the Kupa MANIPRO Passport control box at $225.00 lets you add the KP-60 handpiece later as volume grows.
What products do you need for gel nail services?
Gel work needs a lamp, a base coat, color gel, top coat, cleanser and lint-free wipes, plus a primer if your system calls for one. Keep a clear builder or hard gel for structure and strengthening. Buy the lamp and gels from the same system where possible so cure times match the manufacturer's instructions. A common beginner mistake is buying a cheap lamp that under-cures the gel, which causes lifting and peeling within days regardless of how well you prepped the nail.
What sanitation supplies should a nail technician have on hand?
You need single-use gloves, masks, disposable files or a way to disinfect reusable ones, hospital-grade disinfectant mixed to the label ratio, a covered container for soaking implements, and a lined waste bin. Keep clean and dirty tools separated at all times. In Canada, public health units set the infection control rules salons follow, and they generally require implements to be cleaned then disinfected between clients. Check your local health unit's guidelines before opening.
How much should a new nail technician budget for supplies?
Plan in phases rather than buying everything at once. A first phase covers prep tools, a lamp, one gel system and sanitation basics. A second phase adds the drill, bits and a second service system such as acrylic. A third phase covers backup colors, retail stock and replacement blades or bits. Buying a complete system up front costs more but avoids the waste of incompatible products. Ordering in Canadian dollars from a domestic supplier also removes cross-border shipping and duty from the equation.
How do you set up a nail technician workstation?
Position the client chair and your stool so you can work without leaning forward, then place the table at elbow height. Keep a lamp, drill and hand tools within arm's reach, and store gels and powders in drawers out of direct light. Add a mat under the work area to catch spills, a dust extractor or fan near the drill, and a small tray for the current client's tools. A mobile tech should use a wheeled case with dividers so the same layout can be rebuilt on site.
